Stable Diffusion XL Turbo
Stable Diffusion XL Turbo (SDXL Turbo) 是 SDXL 1.0 的精简版本,能够在单步生成图像,并改进了实时文本转图像的输出质量和采样保真度。
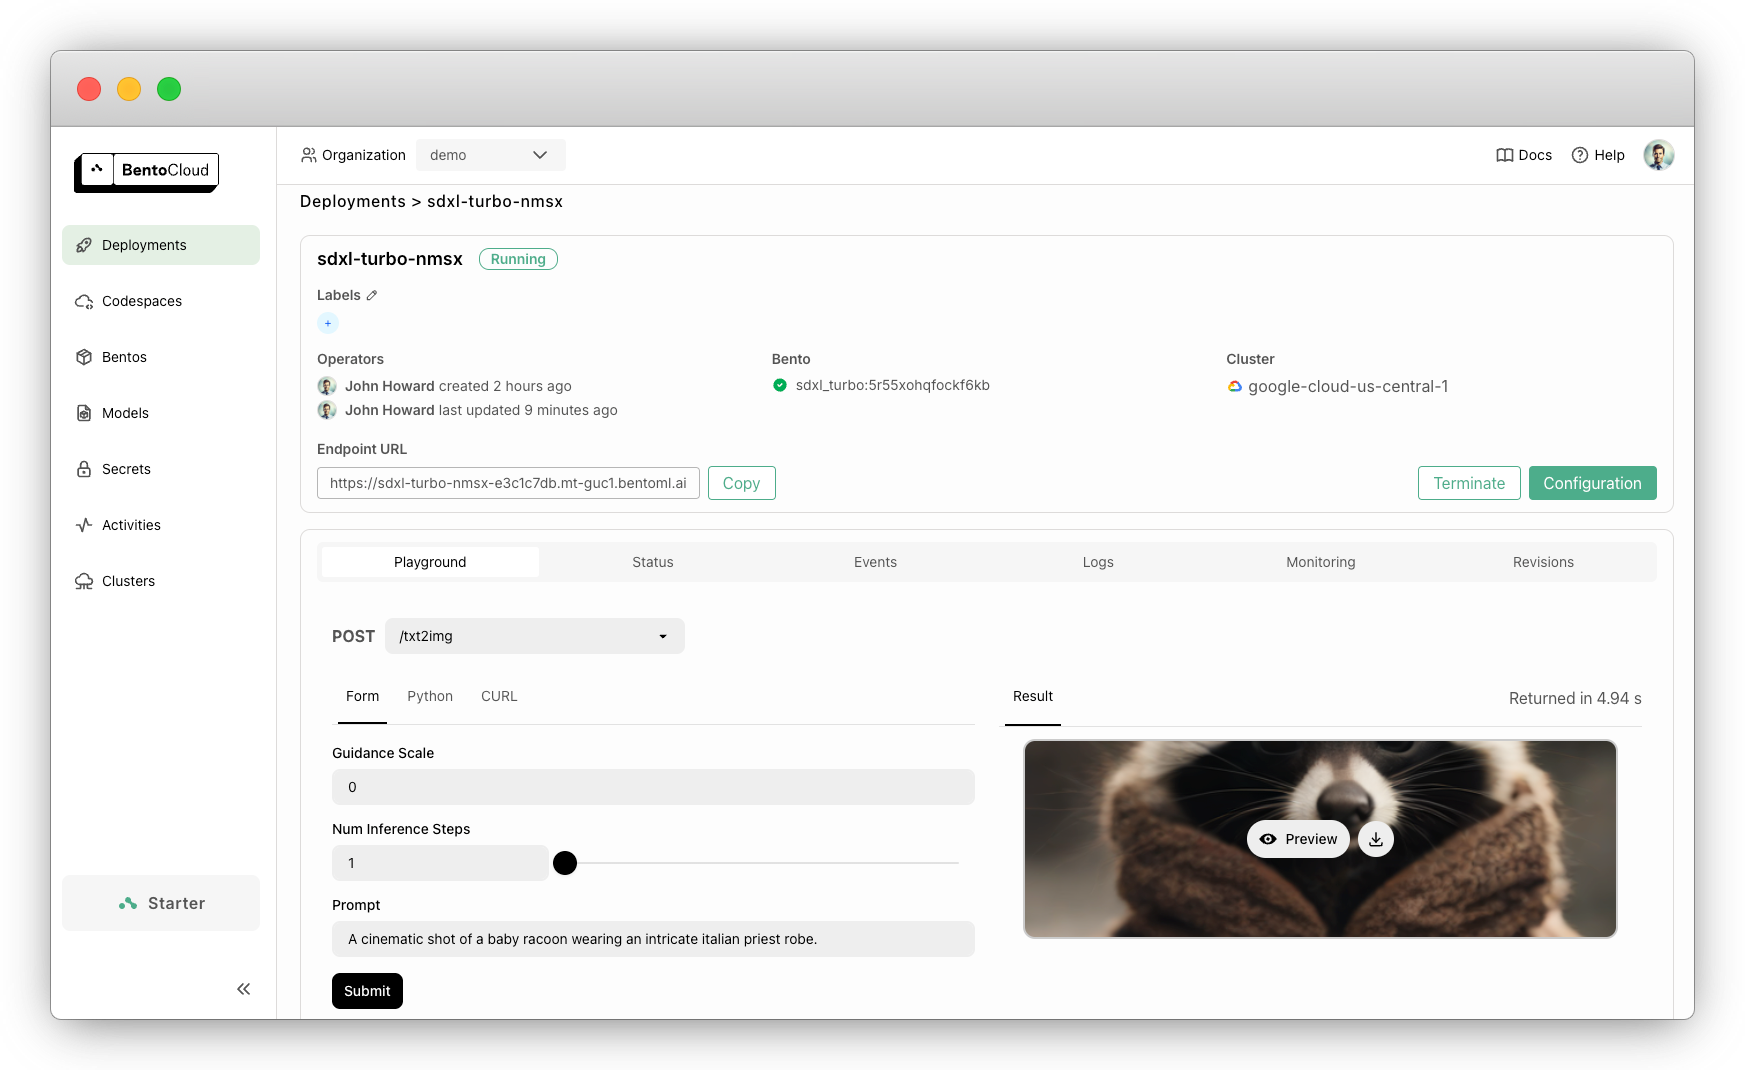
本文档演示了如何使用 BentoML 提供 SDXL Turbo 服务。

生成的推理 API 接受用于图像生成的自定义参数。例如,您可以发送包含以下内容的查询
{
   "guidance_scale": 0,
   "num_inference_steps": 1,
   "prompt": "A cinematic shot of a baby racoon wearing an intricate italian priest robe."
}
示例输出

此示例已准备好在 BentoCloud 上快速部署和扩展。只需一条命令,您即可获得具有快速自动扩缩、在您的云中安全部署以及全面可观测性的生产级应用程序。
代码解释
您可以在 GitHub 中找到源代码。以下是此项目中关键代码实现的分解说明。
定义 SDXL Turbo 模型 ID。您可以根据需要切换到任何其他扩散模型。
service.py¶MODEL_ID = "stabilityai/sdxl-turbo"
使用
@bentoml.service装饰器定义 BentoML 服务,您可以在其中自定义模型的服务方式。该装饰器允许您设置配置,例如超时时间和在 BentoCloud 上使用的 GPU 资源。请注意,SDXL Turbo 需要至少一个 NVIDIA L4 GPU 才能获得最佳性能。service.py¶@bentoml.service( traffic={"timeout": 300}, resources={ "gpu": 1, "gpu_type": "nvidia-l4", }, ) class SDXLTurbo: model_path = bentoml.models.HuggingFaceModel(MODEL_ID) ...
在类中,从 Hugging Face 加载模型并将其定义为类变量。
HuggingFaceModel方法提供了一种高效的机制来加载 AI 模型,以加速在 BentoCloud 上的模型部署,减少镜像构建时间和冷启动时间。@bentoml.service装饰器还允许您为 Bento 定义运行时环境,Bento 是 BentoML 中的统一分发格式。Bento 包含了所有源代码、Python 依赖项、模型引用和环境设置,使得在不同环境中保持一致地部署变得容易。这是一个示例
service.py¶my_image = bentoml.images.Image(python_version="3.11") \ .requirements_file("requirements.txt") @bentoml.service( image=my_image, # Apply the specifications ... ) class SDXLTurbo: ...
使用
@bentoml.api装饰器定义用于图像生成推理的 API 端点。txt2img方法是一个端点,它接受文本提示、推理步数和引导比例作为输入。它使用模型管道根据给定的提示和参数生成图像。service.py¶class SDXLTurbo: model_path = bentoml.models.HuggingFaceModel(MODEL_ID) def __init__(self) -> None: from diffusers import AutoPipelineForText2Image import torch # Load the model self.pipe = AutoPipelineForText2Image.from_pretrained( self.model_path, torch_dtype=torch.float16, variant="fp16", ) # Move the pipeline to GPU self.pipe.to(device="cuda") @bentoml.api def txt2img( self, prompt: str = sample_prompt, num_inference_steps: Annotated[int, Ge(1), Le(10)] = 1, guidance_scale: float = 0.0, ) -> Image: image = self.pipe( prompt=prompt, num_inference_steps=num_inference_steps, guidance_scale=guidance_scale, ).images[0] return image
试用
您可以在 BentoCloud 上运行此示例项目,或在本地提供服务,将其容器化为 OCI 兼容镜像,并部署到任何地方。
BentoCloud
BentoCloud 提供快速且可扩展的基础设施,用于使用 BentoML 在云中构建和扩展 AI 应用。
安装 BentoML 并通过 BentoML CLI 登录 BentoCloud。如果您没有 BentoCloud 帐户,请在此处免费注册。
pip install bentoml
bentoml cloud login
克隆 BentoDiffusion 仓库并部署项目。
git clone https://github.com/bentoml/BentoDiffusion.git
cd BentoDiffusion/sdxl-turbo
bentoml deploy
在 BentoCloud 上运行后,您可以通过以下方式调用端点
创建一个BentoML 客户端来调用端点。请确保将部署 URL 替换为您在 BentoCloud 上的实际 URL。请参考获取端点 URL了解详情。
import bentoml
from pathlib import Path

# Define the path to save the generated image
output_path = Path("generated_image.png")

with bentoml.SyncHTTPClient("https://sdxl-turbo-nmsx-e3c1c7db.mt-guc1.bentoml.ai") as client:
      result = client.txt2img(
          guidance_scale=0,
          num_inference_steps=1,
          prompt="A cinematic shot of a baby racoon wearing an intricate italian priest robe.",
      )

# The result should be a PIL.Image object
result.save(output_path)

print(f"Image saved at {output_path}")
请确保将部署 URL 替换为您在 BentoCloud 上的实际 URL。请参考获取端点 URL了解详情。
curl -s -X POST \
  'https://sdxl-turbo-nmsx-e3c1c7db.mt-guc1.bentoml.ai/txt2img' \
  -H 'Content-Type: application/json' \
  -d '{
      "guidance_scale": 0,
      "num_inference_steps": 1,
      "prompt": "A cinematic shot of a baby racoon wearing an intricate italian priest robe."
  }' \
  -o output.jpg
注意
SDXL Turbo 能够在单步执行推理。因此,将
num_inference_steps设置为1通常足以生成高质量图像。此外,您需要将guidance_scale设置为0以将其停用,因为该模型在训练时没有使用它。请参阅官方发行说明了解更多信息。为确保部署在一定范围的副本内自动扩缩,添加扩缩标志
bentoml deploy --scaling-min 0 --scaling-max 3 # Set your desired count
如果已部署,按如下方式更新其允许的副本
bentoml deployment update <deployment-name> --scaling-min 0 --scaling-max 3 # Set your desired count
有关更多信息,请参阅如何配置并发和自动扩缩。
本地服务
BentoML 允许您在本地运行和测试代码,以便您可以使用本地计算资源快速验证代码。
克隆仓库并选择您想要的项目。
git clone https://github.com/bentoml/BentoDiffusion.git
cd BentoDiffusion/sdxl-turbo

# Recommend Python 3.11
pip install -r requirements.txt
在本地提供服务。
bentoml serve注意
要使用 SDXL Turbo 运行此项目,您需要一块至少具有 12G 显存的英伟达 GPU。
访问或发送 API 请求到 https://:3000。
要在您自己的基础设施中进行自定义部署,请使用 BentoML 生成 OCI 兼容镜像。